Job descriptions are stuffy and boring. So, here’s a more detailed description on what a day in the life of our heavy equipment operator jobs in Nixa, MO are really like.
Note: Not all images are from the same job as this is merely an example of what you may encounter in the role of a heavy equipment operator.
The Start Of Your Work Day
It’s 5:00 am and that familiar sound of your alarm going off means your day is about to begin. As you’re driving in, "a day full of dominating the earth’s soil and rock," is what that voice in your head says as you take another sip of coffee. "I wonder if I’ll hit rock today?" You ask yourself.
As you pull in to work, you’re greeted by your fellow friendly team members. The early morning jokes begin and the atmosphere reminds you of how much you despised your last stuffy-corporate work environment. Then, the satisfaction of knowing your day is going to be enjoyable sets in.
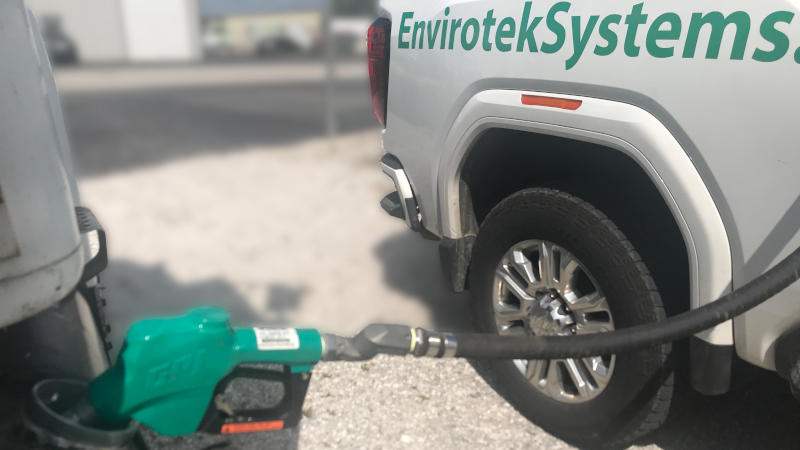
You first begin with fueling the road tractor and backhoe, checking air pressure as well as the oil and water levels.
Another morning task includes you starting the road tractor to get it warmed up. It’s something by now you could do with your eyes closed.
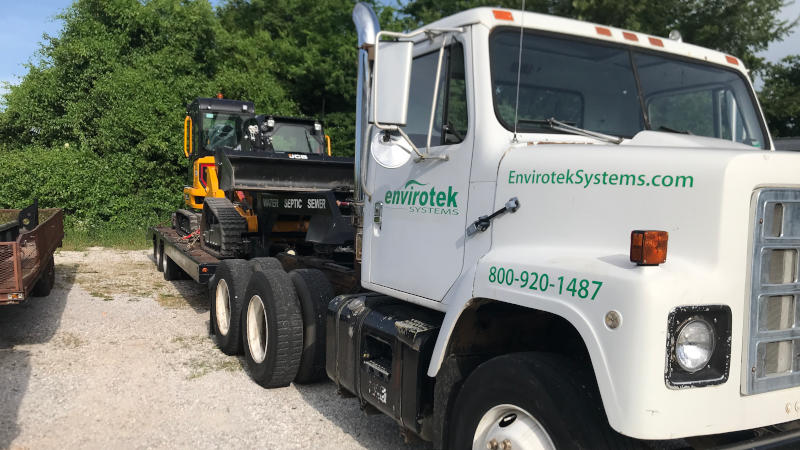
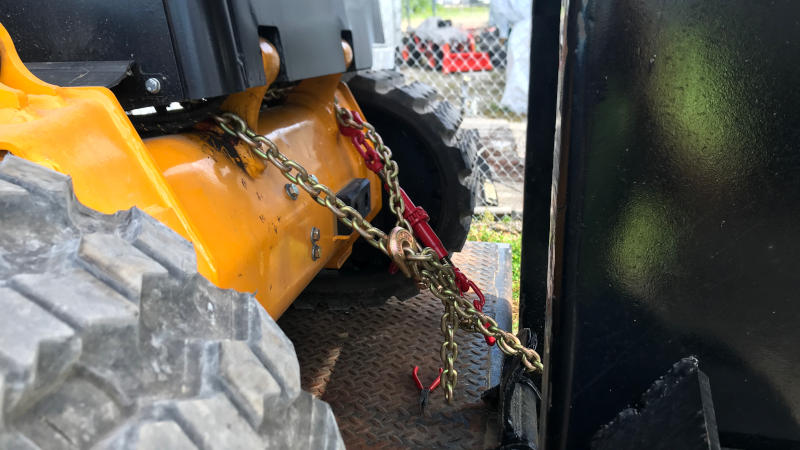
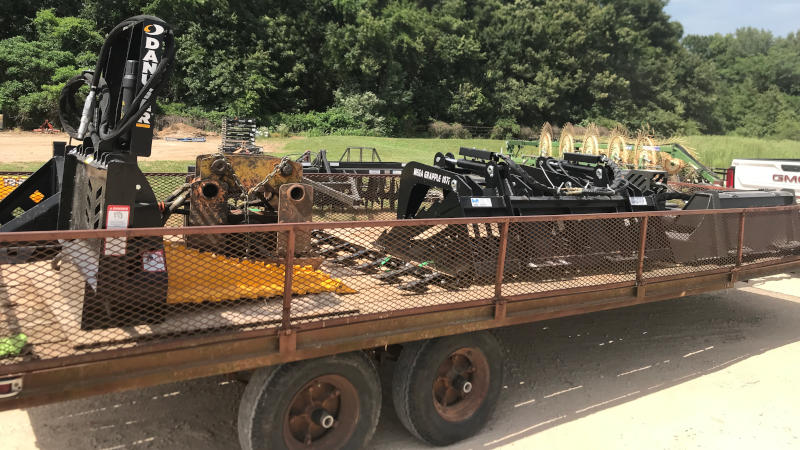
You perform your predeparture checks, including inspecting all chains and ratchet load binders to ensure that the trailer and equipment are secured.
You load up the remaining equipment needed for today’s job, including the rock breaker and tamper.
It’s been about 30 minutes and the morning meeting is about to begin. It’s the start of the 2nd day for this job, so you’re already familiar with what to expect. A few key focal points and everyone is out the door.
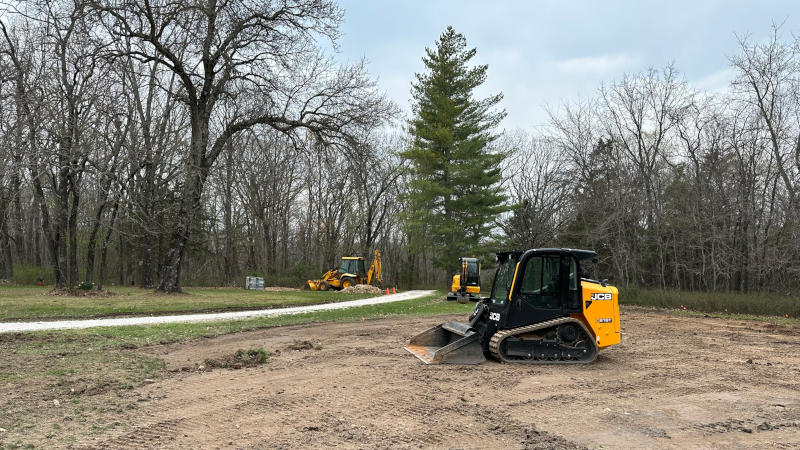
Arriving At The Job Site
Today’s task includes you starting with the septic tank excavation job. Since you marked the water & utility lines yesterday, you already know exactly where you plan to position the backhoe.
You know from this morning’s meeting what depths you need to excavate to so the tank can be set.
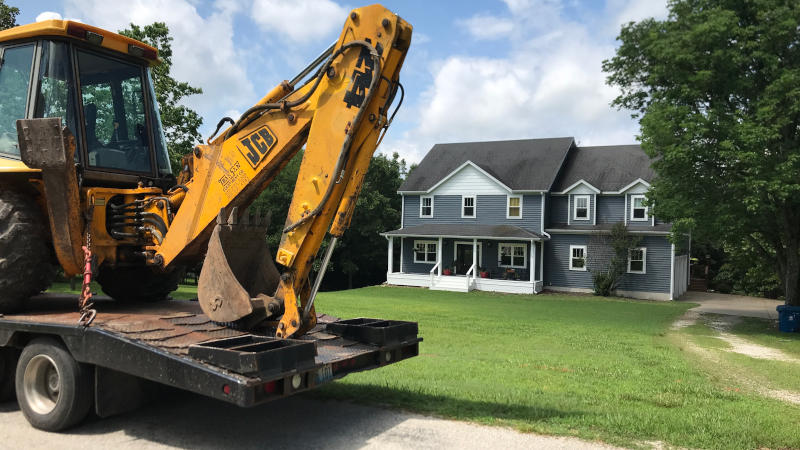
Upon arrival at the job site, before parking, you wait for the team to pull in with the other trucks and trailers that include the tools and equipment.

Once they’ve arrived, everyone starts unloading the materials needed for the day.
You’ve started unchaining the backhoe, getting it ready to unload. You look across and see your team member unchaining the other side of the trailer at the same time as you do. You climb up, get in, and start unloading the backhoe.
Excavating The Septic Tank Hole
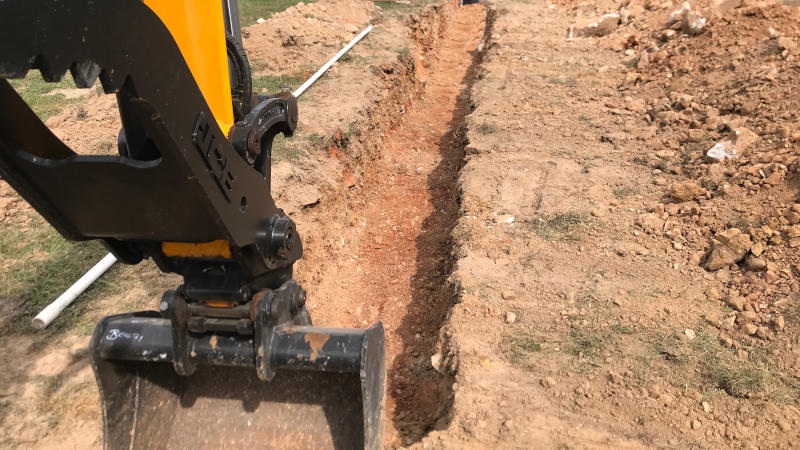
You position the backhoe in place, and your team member gives you the signal to start digging. You begin near the foundation to expose the inlet pipe for the septic tank.
Your team member is keeping an eye on where the teeth from your backhoe bucket are penetrating the soil to ensure nothing gets damaged.

Once the tank’s inlet pipe is exposed and uncovered, it’s time to start excavating the hole.
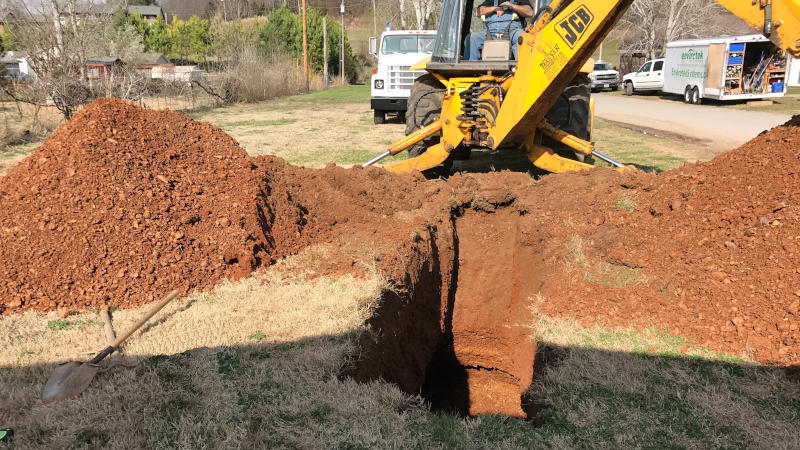
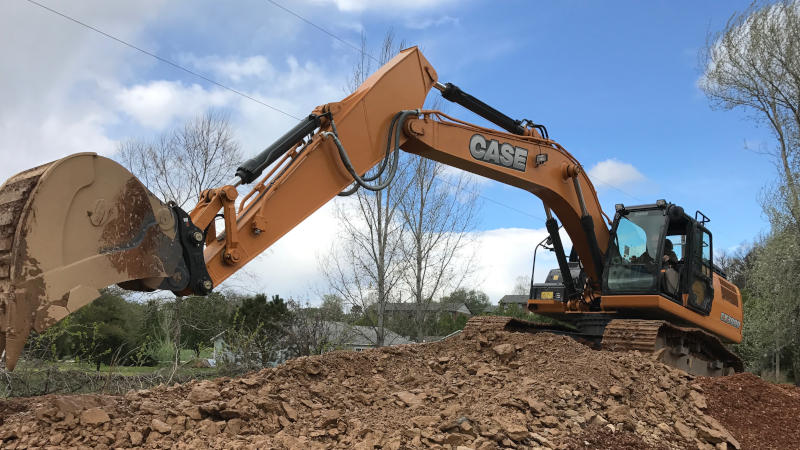
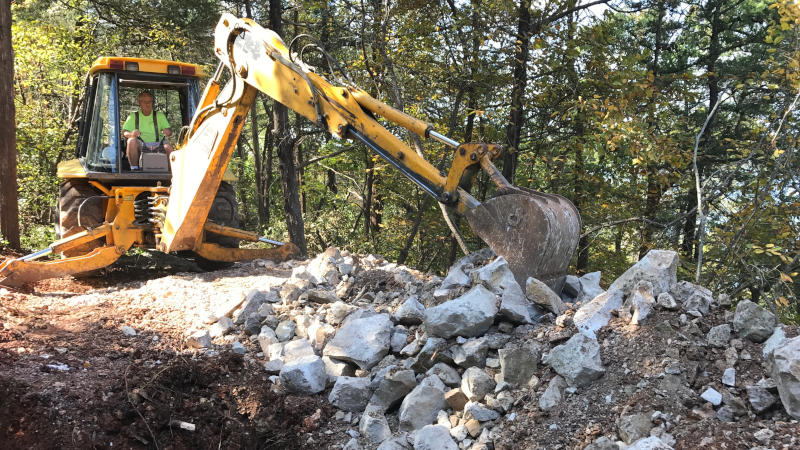
After about 5 feet of digging this septic tank hole, you hit solid rock. This was predicted due to the rocky soil of this area.
Now that you have encountered solid rock, it’s time to switch to the rock breaker.
As you begin with the rock breaking, that early morning thought you had in your head becomes a reality. "A day full of dominating the earth’s soil and rock".
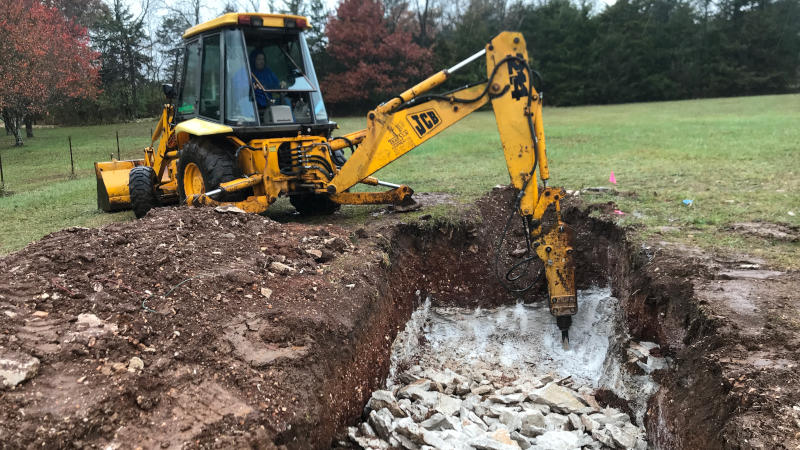
As you are breaking up the rock, you silently tell yourself, “this is a nice change of pace“. The opportunity to use a hydraulically powered tool that can bust through some of the toughest stone is an exciting job perk!
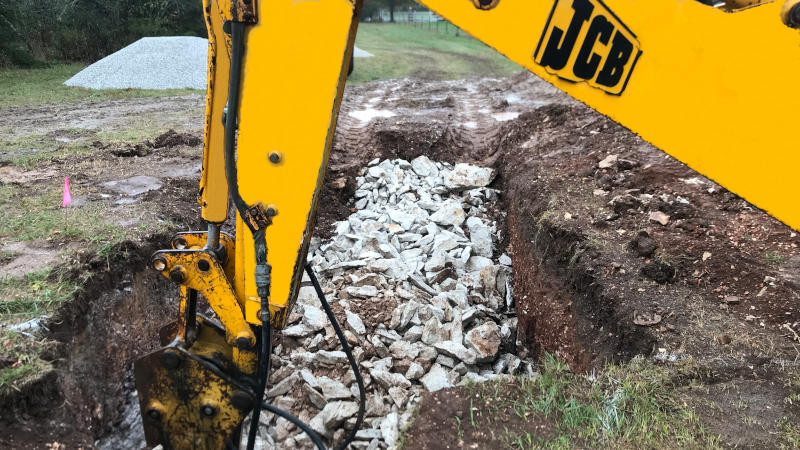
Now that you have broken up the rock, it’s time to switch back to the bucket and excavate the rock material.
Once you have removed all the rock, your team member checks the hole’s elevations, and now it’s on to starting the lateral line trenches.
Arriving At The Job Site – Day 3
As you arrive on site, from your peripheral you catch a glimpse of yesterday’s piled dirt from the lateral line trench you started, knowing that today you’ll be continuing that task.
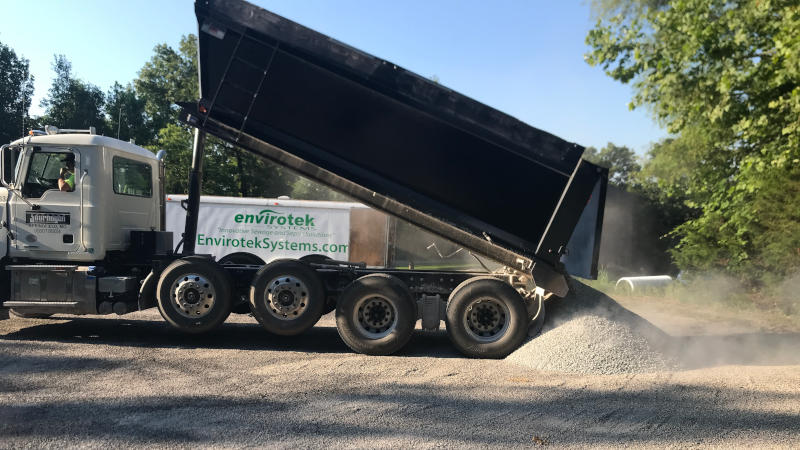
There’s a load of gravel coming in this morning, so you park the backhoe before continuing with the trench as you wait for the delivery.
Some remaining job-site procedures still remain, so you jump in and help out your fellow team member. You help with unloading the pipe and carrying tools over near where the septic tank will be installed. You also grab a can of marking paint to outline the septic tank area for placement.
The gravel has arrived, so you assist the delivery driver with where to place it.
After the gravel has been delivered, it’s back to where you left off yesterday.
Continuing With The Lateral Line Trenches
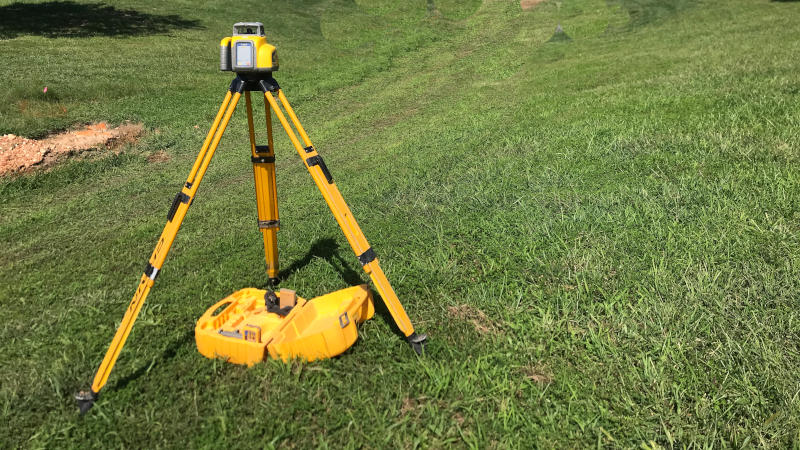
Today’s tasks include finishing the trenches for the lateral field lines and prepping the hole for the tank. Prior to digging, your team member has set up the laser level for taking elevations.
As you position the backhoe into place, your team member gives you an identified starting point and signals to dig down 2 more inches to grade. After your bucket levels out the section, it’s time to move on to the next one.
This stretch of lateral line is the same length, but before you begin, you, along with your team member, are taking new elevations due to the slope of the property. Once calculated, you begin digging to the desired depth. This continues for the next and final lateral line trench that you are going to dig.
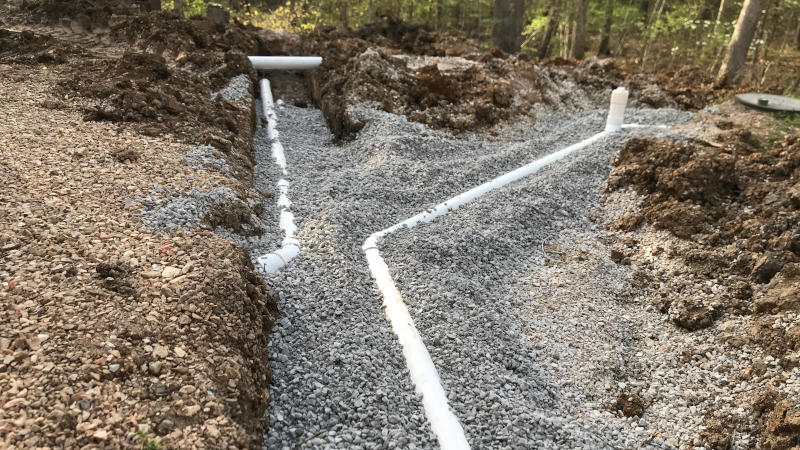
Filling Lateral Line Trenches With Gravel
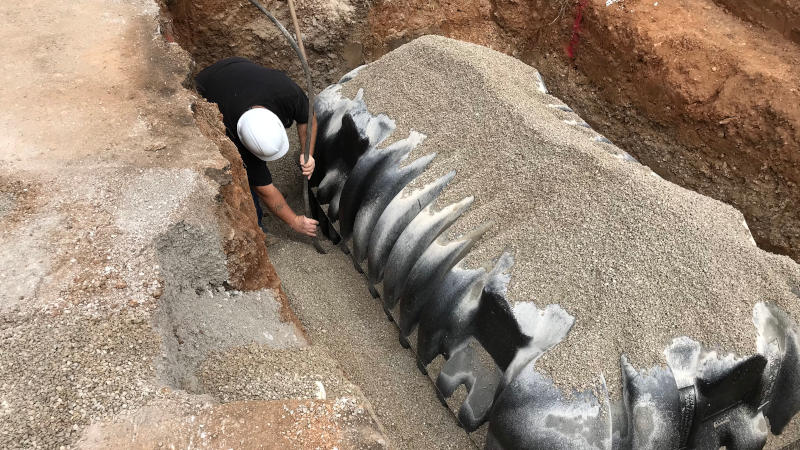
Now it’s time to place the gravel in each lateral line trench.
As you begin, your team member signals to you where to dump the gravel in the trench.
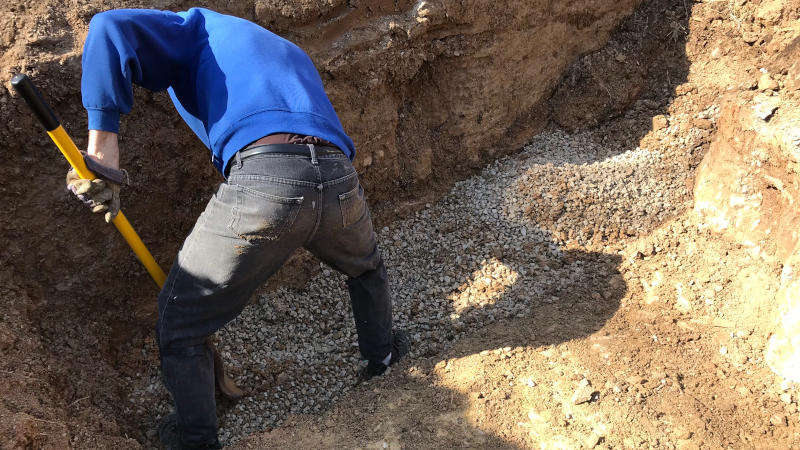
After your first bucket load has been placed into the trench, you get out of the machine and assist your team member with spreading the gravel.
After the gravel has been distributed evenly, you check for grade as your team member is leveling out and compacting the gravel.
You repeat these processes until all remaining lateral line trenches have been completely prepped for pipe.
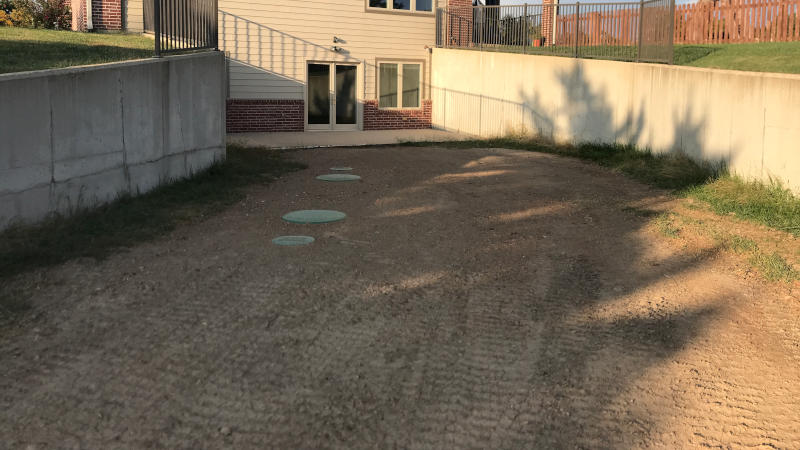
Prepping The Hole For The Septic Tank
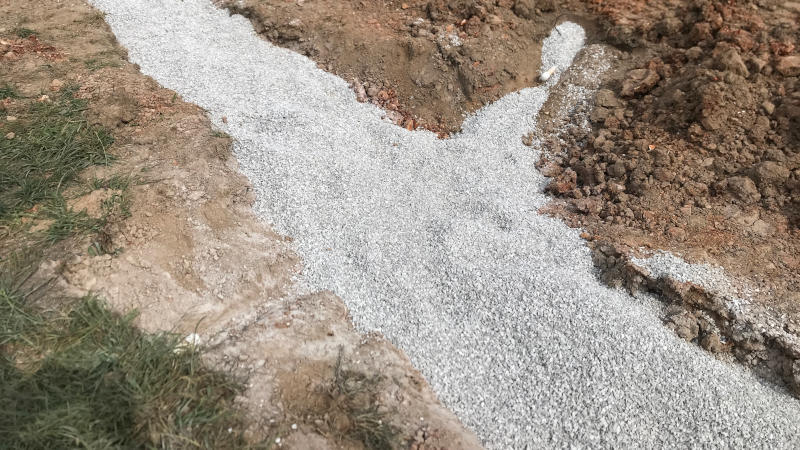
The lateral line trenches are dug, prepped with gravel, compacted and leveled to grade. Now it’s time to start prepping the area for the septic tank.
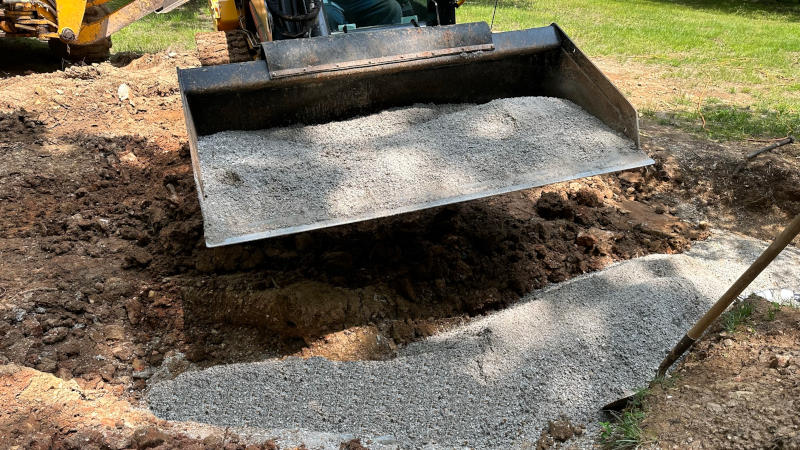
To begin with, you bring over a load of gravel in the backhoe bucket. Your team member signals how much to dump. From there, your team member begins to spread out the gravel.
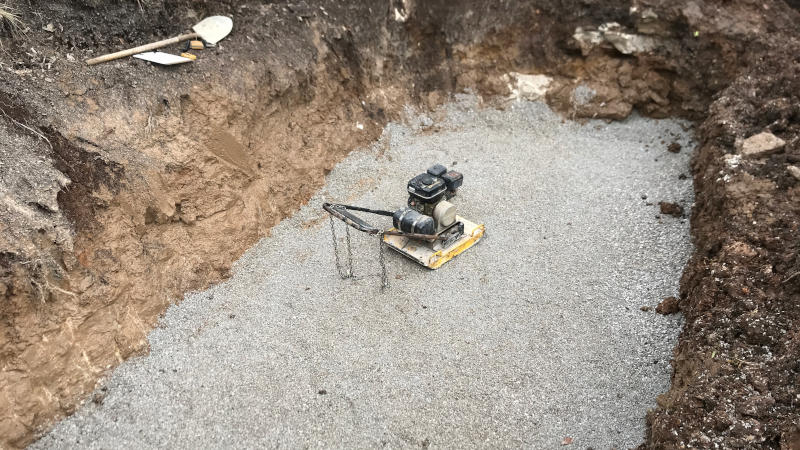
Once you have dumped the gravel, you bring over the walk-behind plate compactor. You’ll need this to compact the gravel to ensure a level and firm area for the tank.
Next, you position the laser level at a closer proximity to where the septic tank will be installed.
Your team member has spread out a fair amount of gravel, but there is still more to spread. You assist your team member with spreading out the gravel.
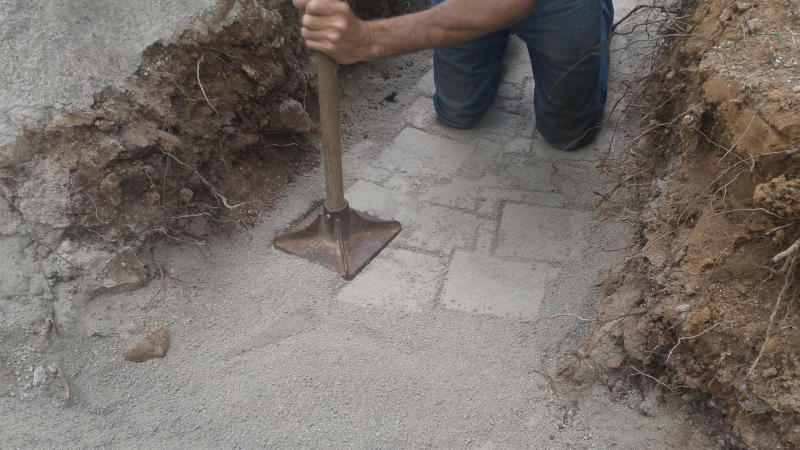
Once enough gravel has been placed, now it’s time to begin tamping and leveling it out. You both get in the hole and while your team member is tamping, you take elevations to ensure everything is to grade.
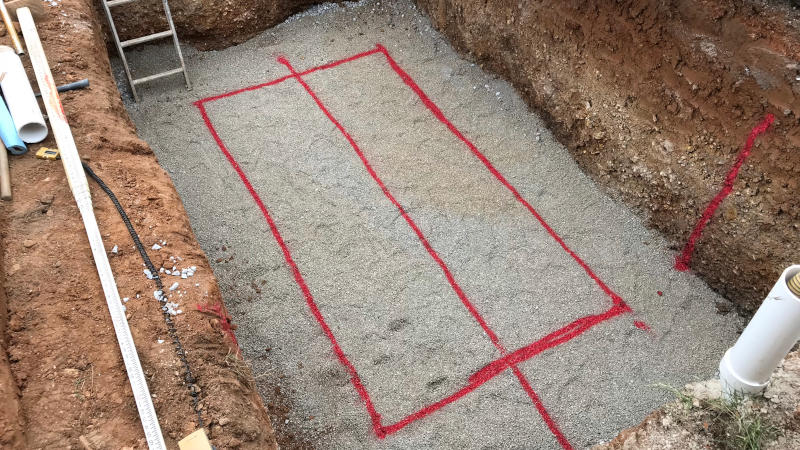
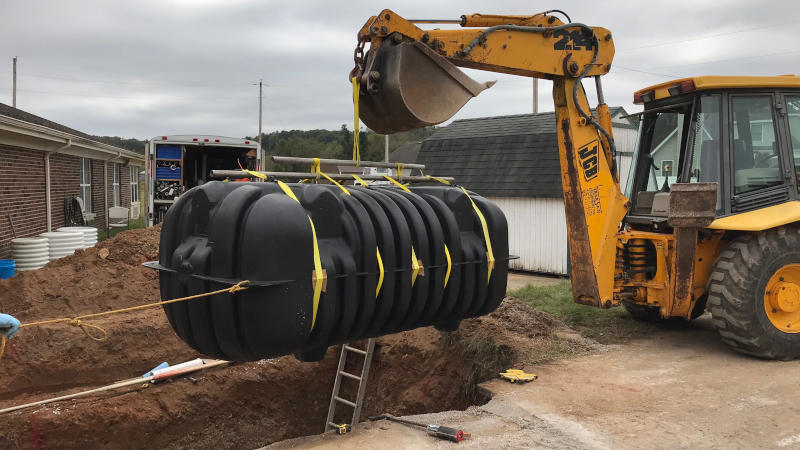
Once finalized and to grade, you take measurements of the hole to determine the precise location of where the tank will be set.
After reviewing the site-plans, you understand the required dimensions and begin using the marking paint to outline the tank area. This is where you will precisely place the tank.
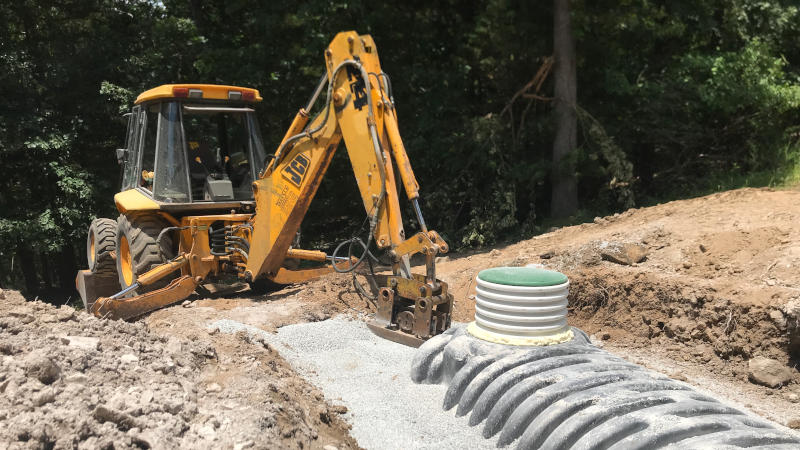
You and your team member set up the necessary straps and devices on the tank itself in order to lift and place it.
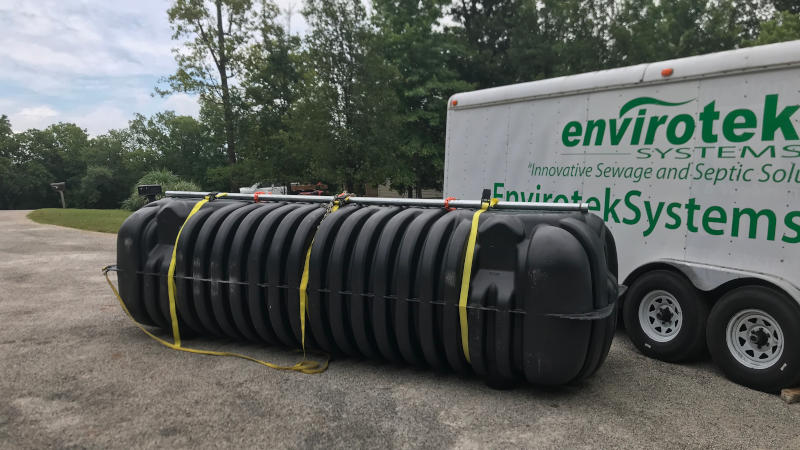
After it is hooked up, you carefully transfer the tank to the hole and lower it into place.
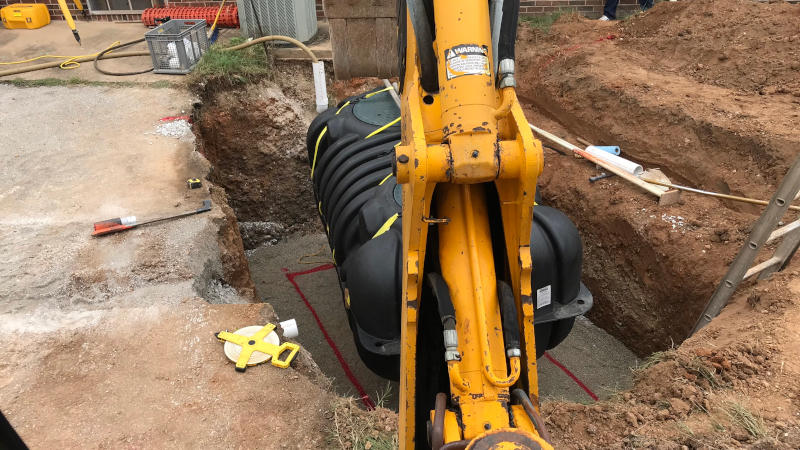
After the tank has been set, you double check all elevations and check for tank slope, which, as you know, there shouldn’t be any slope.
Once you’ve determined the tank is level, you begin loading up your bucket with gravel to bed around the tank.
With careful placement, you begin to dump gravel along the edge of the septic tank.
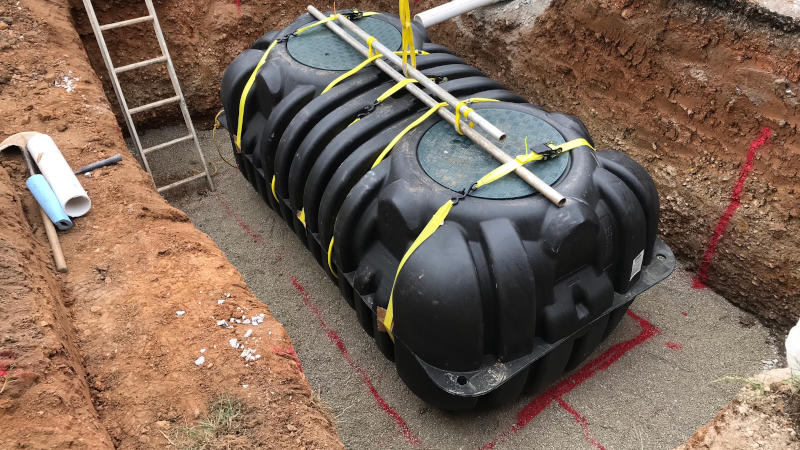
Your team member signals you to stop after enough initial gravel has been placed. Now your team member starts to compact the gravel along the sides of the tank.
After the first compaction process, your team member signals you to dump more gravel. This process is repeated until the gravel has reached near the top of the tank.
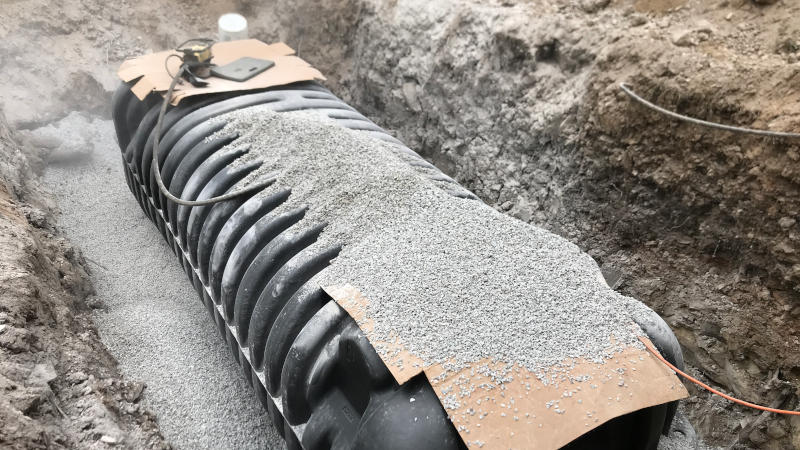
Once your gravel level has reached the top of the tank, now it’s time to switch the backhoe bucket out for the tamper.
This is the final gravel compaction process for the septic tank prior to backfilling it with dirt.
That was a lot accomplished for today. Tomorrow should be a breeze!
Your 4th And Final Day On The Job Site
The first day on this job was mostly preliminary work:
- You marked for utility and water lines
- You delivered materials and prepped the equipment
The second day involved:
- You broke rock and excavated the septic tank hole
- You started the lateral line trenches
Yesterday, you finished with the lateral line trenches as well as prepped for and placed the septic tank. Today should be the completion of this job with laying the lateral lines, connecting to the tank, backfilling the trenches and the final grading process.
Connecting The Septic Tank
As outlined in this morning’s meeting, today you’ll start by connecting the septic tank to the home’s plumbing.
You assist your team member in getting all the necessary components laid out and placed. This includes the gravel, pipes, tools, fittings, glue and level measures.
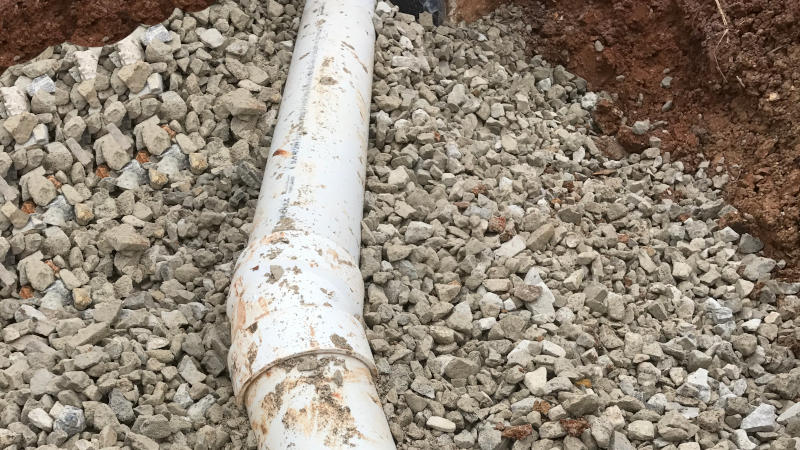
You start by connecting the home’s plumbing to the septic tank. Once connected and checked for proper slope, you assist your team member with bedding gravel around the pipe.
Installing The Lateral Line Piping
Once the tank has been connected, you move on to installing the lateral lines before connecting the tank’s outlet piping.
You and your team member place all lateral line piping into each trench.
Next, you both assemble the pipes with cleaner and glue. After all lateral lines have been placed and assembled, you connect each lateral field piping together with the appropriate fittings.
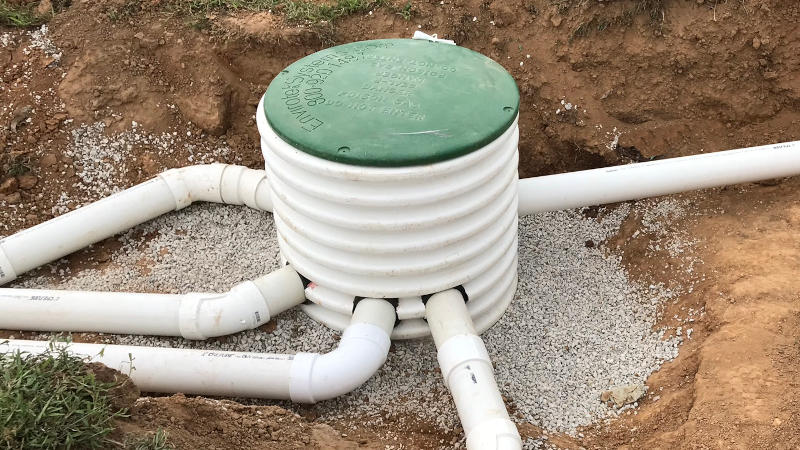
Now it’s time to connect the lateral lines to the septic tank’s outlet pipe. Just like connecting to the home’s plumbing, you ensure that the outlet pipe has the correct slope before bedding it with gravel.
While most of the morning hasn’t involved much machinery work, it’s now time to use the backhoe. You begin by loading your bucket with gravel. This is what you’re going to bed the lateral line pipes with.
Your team member signals to you the location of where to place the gravel. Once the gravel is placed, it’s time to bed the gravel around the lateral line pipes.
You and your team member both place the gravel around the entire lateral line piping, including the connection points.
After all the pipe has been bedded, it’s time for the inspection.
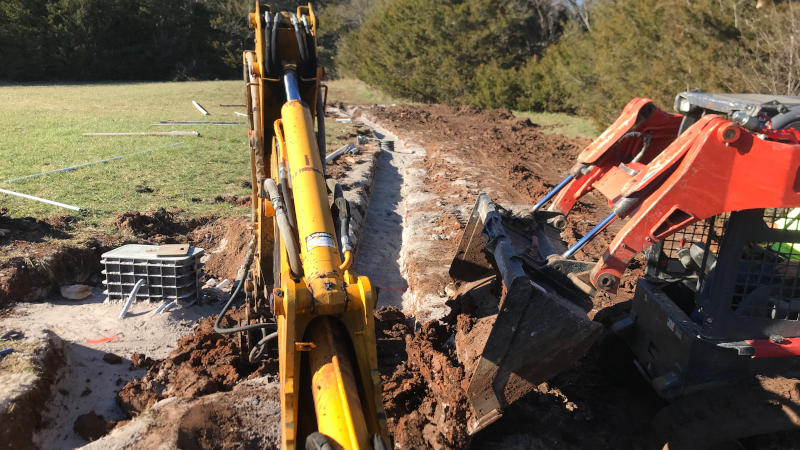
Backfilling The Trenches
After approval has been authorized by the county inspector, it’s time to move on to backfilling the lateral line trenches and septic tank area. Before you start backfilling with dirt, you finish covering all piping with more gravel as laid out in the job-site plans.
After all the piping has been fully covered in gravel, it’s time to backfill with dirt.
As you’re backfilling with dirt, your team member assists where needed.
After the backfilling process is complete, it’s now time to move on to final grading and yard seeding.
Final Grading & Yard Seeding
For this job’s final grading requirements, you’ll be using a CTL (compact track loader). This piece of equipment was delivered on day one.
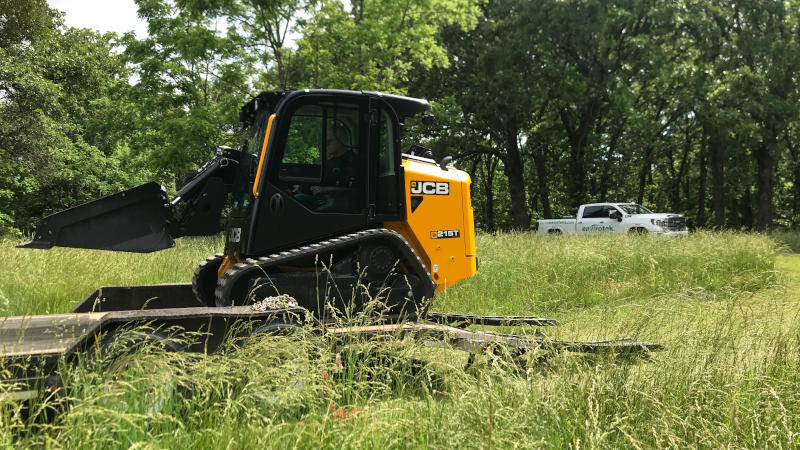
As you’re operating the CTL, your team member is assisting you as you go.
Your team member is raking up any remaining rocks as well as placing the final touches on the grading process.
Once all grading is completed, it’s time to move on to the grass seeding.
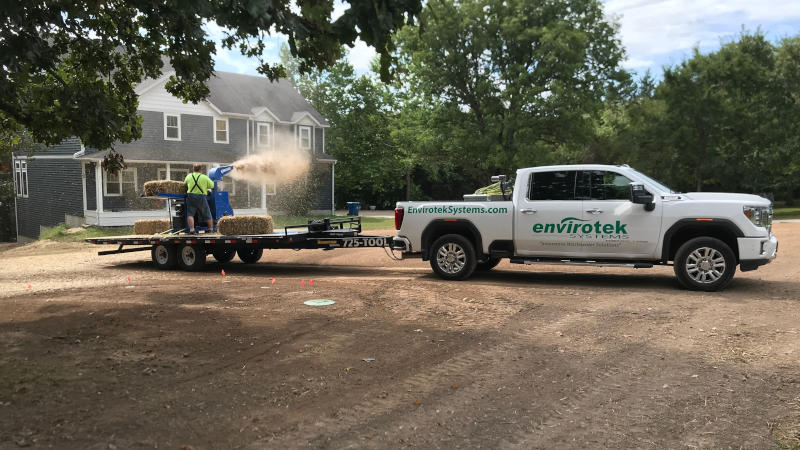
As your team member loads the straw, you operate the straw blower to distribute the straw over the seeded areas. Once all areas are covered, it’s time to wet down all seeded areas and call it a job well done!

Some Details About This Heavy Equipment Operator Job
Hopefully, this example we provided on the duties of our heavy equipment operator position provides you with a better understanding of what to expect. You will fulfill many roles. It’s not strictly machinery related all the time.
Occasionally, you’ll have to get in the ditch with a shovel and or assemble pipes and fittings. However, most of the time you’ll be responsible for operating equipment on the job site.
Here’s a few responsibilities of the job…
- Operate machinery as needed
- Perform scheduled equipment maintenance
- Managing on-site job crew (optional)
- Hands on ditch work including digging, laying pipe & assembling components
- Operate smart phone with job related software (optional)
- Record and interpret elevations with laser level
Envirotek Systems is looking to hire an experienced equipment operator or someone who has always wanted to learn how to operate heavy equipment, as we are willing to train the right individual.
We offer the following…
- $20 – $35 an hour
- Paid Vacations
- Flexible Schedule
- Bonus Pay
While we are located in Nixa, our equipment operator jobs will require working in all areas of southwest Missouri including Branson, Hollister, Forsyth, Branson West, Reeds Spring, Galena, Cape Fair, Kimberling City, Lampe, Table Rock Lake, Shell Knob, Monett, Aurora, Republic, Nixa, Ozark and Springfield.
View the full details of this job.